Emma Reed was near a drone explosion about four minutes ago. No interventions have been performed. Your team has secured the area. The goal of this scenario is to slowly guide you through performing a Rapid Casualty Assessment. This scenario is the longest in the course as it provides foundational concepts that will be practiced in the following scenarios. Next, select the [Advance Arrow] on the Guidance Panel or press and hold [B] to proceed
This scenario includes several informational comments that will frequently be presented in Italics. Informational comments do not require you to do anything directly in the simulator. Action-oriented comments that direct you to do something will be presented in [Bold] text.
Informational Step: Overall, the phases of care include (Care Under Fire, Tactical Field Care, and Tactical Evacuation Care). Since you are in a safe location and just started caring for this patient, you are in the Tactical Field Care phase. Next, we will begin working through this scenario step by step.
Informational Step: We will use the M A R C H acronym to guide the sequence of care interventions. M-Massive Bleeding, A-Airway, R-Respirations, C-Circulation, H-Hypothermia. This is followed by Head Injury, Burns, Eye Trauma, Fractures, Communication, and Documentation.
The first step in the Rapid Casualty Assessment is to assess if the scene is safe. This scene is secure. If the scene isn’t secure, minimize the risk of harm to yourself while trying to return fire (if relevant) and get the patient (and you) to a safer location. The only intervention recommended in an unsafe location (Care Under Fire Phase) is tourniquets for massive bleeding.
The next step is to assess the casualty for responsiveness. Since this casualty is looking at you, they are likely responsive. Still, ask them a question to confirm this. Press [A], select an (i) icon, and choose a question. You can also tap the patient on the shoulder by pulling the [TRIGGER] near the patient’s shoulder.
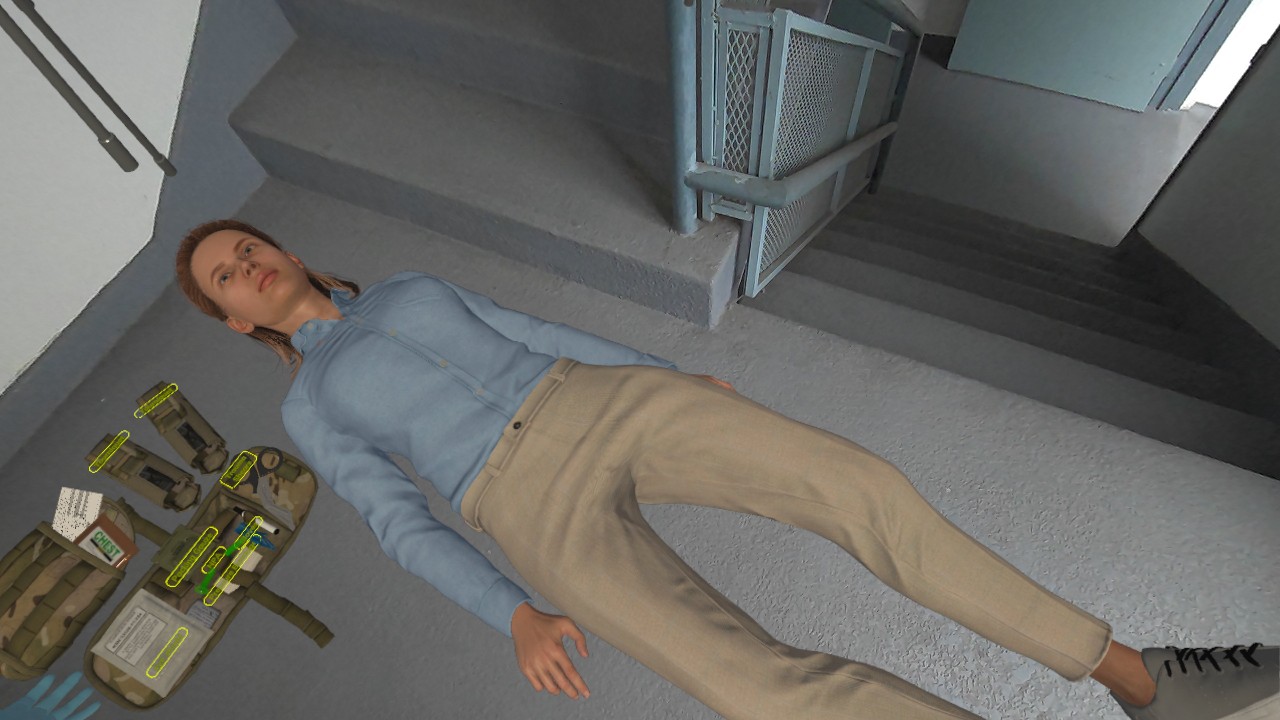
Next, let’s get our equipment out and ready. You have an IFAK (look down). Use your controller and [TRIGGER] to pick up and open your IFAK. Using the patient’s equipment first (for example, their IFAK) is essential in real life. Since this is a civilian, they do not have an IFAK.
Next, it is critical to use personal protective equipment (PPE) if it is available. In the IFAK, there are a pair of gloves. Put gloves on your right and left hands.
Next, we will start using the MARCH acronym to guide care. The first step is to assess for any MASSIVE BLEEDING [M]ARCH. The goal is to STOP life-threatening bleeding. At the All Service Member (ASM) / Tier 1 level in Tactical Combat Casualty Care, your top priority is controlling massive bleeding, as it is the leading cause of preventable death on the battlefield.
Informational Step: Assessing for massive bleeding can be broken down into two high-level parts. The first part is to search for any MASSIVE BLEEDING that can be quickly treated with a tourniquet (for example massive bleeding from an extremity where a tourniquet could be wrapped around it above the bleeding site). The second part is to search for subtle massive bleeding by performing a blood sweep.
First, look for bright red blood spurting or pooling around a limb (this is important, as this is where tourniquets can be used). Do you see bleeding like this on this patient (Yes or No)?
If you said ‘No,’ you are correct! This patient does not have any spurting or pooling blood around their limbs.
Informational Step: If you did see spurting or pooling around their limbs, act immediately. Apply a tourniquet high and tight on the limb—over clothing if necessary—and tighten it until the bleeding stops. Record the time of application so medics know when it was placed.
Informational Step: For bleeding that cannot be controlled with a tourniquet—such as in the neck, groin, or armpit—apply direct pressure with a gloved hand and pack the wound with hemostatic gauze and hold pressure for at least 3 minutes.
The next step is to search for subtle massive bleeding with a blood sweep. Use your hands to check along the patient’s neck, armpits, arms, torso, back, groin, and legs. Did you find any subtle massive bleeding (Yes or No)?
This patient has no subtle massive bleeding on blood sweep.
Informational Step: If you did find "active bleeding," expose the area and address the bleeding immediately with a tourniquet, direct pressure, hemostatic gauze, or a pressure bandage as indicated.
In TCCC, once life-threatening bleeding is controlled, the next priority is assessing and managing the AIRWAY M[A]RCH. The goal is to maintain an open airway and to recognize problems early, take basic steps to open the airway (if needed), and call for help quickly so the casualty can get the care they need.
You asked this patient a question moments ago, and their voice was clear, which means their airway is clear. At the All Service Member (ASM) / Tier 1 level in Tactical Combat Casualty Care, your job during the airway phase is to ensure your patient’s airway is clear. If the casualty is awake and talking, their airway is open, and no action is needed.
In real life, at this point, you would not need to assess this patient’s airway further. However, for training purposes, let’s directly look at this patient’s airway (looking inside their mouth). Put your controller on the right and left side(s) of the patient’s jaw, then pull both triggers. This will perform a jaw thrust that lets you directly visualize the airway.
Another way to assess is by listening to the patient's airway. Turn your head to place your ear by the patient's mouth. If there is an obstruction, breathing will sound labored. If the airway is clear you will not hear anything.
Informational Step: In real life, it is essential to reassess the airway throughout care and transport—combat casualties can deteriorate quickly, especially if unconscious or injured near the face or neck.
In TCCC, once life-threatening bleeding is controlled, and the airway has been assessed and cleared, the next priority is assessing and managing RESPIRATIONS MA[R]CH. At the All Service Member (ASM) / Tier 1 level in Tactical Combat Casualty Care, your role in managing respirations is recognizing when a teammate has an injury that affects their breathing, so you can prioritize getting them to somebody who can help.
Start looking at the patient’s chest, identifying how fast and hard the patient is breathing. The normal respiratory rate (how many breaths a person takes in a minute) is 12 to 20 breaths per minute. If the patient is breathing fast or slow, this can indicate a more serious injury. Count this patient’s respiratory rate.
The patient’s respiratory rate is 16, which is normal (between 12 and 20 breaths per minute).
Next, start to look for signs of a dropped lung under pressure (tension pneumothorax), including only one side of the chest moving, jugular vein distention (neck veins get big), tracheal deviation (windpipe pushed to one side) (late sign), or shock (weak pulse). If a tension pneumothorax is suspected, it is critical to get them to somebody who can help decompress their chest by performing a needle decompression.
Next, we need to expose the casualty’s chest to visually inspect for open wounds that can cause a tension pneumothorax, such as sucking chest wounds (sounds/bubbling), gunshot wounds, or other trauma. First, pick up the shears (scissors) and click the [TRIGGER] near the patient’s clothing to remove. Next, look at the patient’s chest. Then roll the patient over to assess the ‘back’ of their chest. Then roll them back.
Informational Step: Chest wounds can be very subtle and easy to miss. It is essential to look in the patient’s armpits (axilla) and around mammary (breast) tissue. Additionally, some severe wounds are tiny, and only appear if you ‘rake’ (put tension) on the skin. So, while performing this assessment in real life, you can use your hands to pull gently on the patient’s skin to help find these subtle wounds.
Informational Step: In female patients, if there is any concern for life-threatening injuries, it is essential to assess under their undergarments (bra) and to move the mammary tissue (breasts) to evaluate for any wounds. While less common, this can also occur in males with large amounts of chest wall tissue.
Informational Step: In real life, it is essential to communicate to the patient why you are assessing this (chest) area. Move quickly and be as respectful as the situation allows.
While this patient does not currently appear to have any severe chest wounds or difficulty breathing, we will review how to perform this examination on a female patient for training purposes. Use the shears to remove the patient’s undergarments (bra).
Next, for training purposes, use the back of your hand and bring near the patient’s mammary (breast) tissue to displace (move) it and inspect for wounds. Throughout this assessment, did you find any chest/respiratory injuries?
This patient does not have any wounds on the front (anterior) or back (posterior) of their chest, in the axilla (armpits), under their undergarments, or under their mammary (breast) tissue. Also, there does not appear to be unilateral chest rise or fall or any other evidence of a tension pneumothorax.
Informational Step: If you identified signs of a chest wound, the patient would likely need a Chest Seal, a special dressing designed to cover the wound while allowing trapped air to escape. And if you identified signs of a tension pneumothorax, the patient would likely need a Needle Decompression, a procedure that releases pressure built up around the patient’s heart and lungs. Those actions are beyond the scope of this course.
Informational Step: A common mistake is packing an open or sucking chest wound with gauze. We cover wound packing later, but if you see an open wound on the chest, most often it should not be packed (filled) with gauze but should be covered with a chest seal (this is a Tier 2 skill).
Informational Step: While this casualty does not have an apparent injury currently, breathing issues can worsen rapidly in combat casualties. The key in the respiratory step is to identify and facilitate the treatment of chest injuries early to prevent respiratory failure and death.
In TCCC, once life-threatening bleeding is controlled, the airway has been assessed and cleared, and the chest and respirations have been assessed and managed, the next priority is assessing and managing CIRCULATION MAR[C]H.
Start by looking for signs of shock and treating any ongoing bleeding that has not already been controlled. While Tier 1 training does not cover specific things to do for a patient in shock, simply identifying that a casualty may be in shock can help you know that the patient needs more treatment fast. This can help prioritize transport and treatment, which can save lives.
Informational Step: Shock happens when insufficient blood (and oxygen) reaches the patient’s organs. One of the most common signs of shock we look for is a high heart rate (higher than 100) (tachycardia). Some other potential signs of shock are pale or clammy skin, weakness, confusion (not due to head trauma), decreased urine output, and prolonged capillary refill (skin blanches for more than 3 seconds).
Next, let’s start to assess for evidence of shock. First, check the patient’s heart rate. Feel the patient’s radial pulse by putting your hand near the patient’s wrist and pay attention if it is ‘weak’ or ‘strong.’ A normal pulse rate is between 60 and 100. Is this patient’s heart rate fast (tachycardia), slow (bradycardia), or normal? Is the patient’s pulse weak or strong?
This patient’s heart rate is normal (between 60 and 100). If the patient’s heart rate is very fast or slow, this could indicate that the patient is in shock (in shock, the patient’s heart rate is typically high). This patient’s pulse is strong (in shock, the patient’s pulse is usually weak).
Next, we can check if the patient is confused (a sign of shock). Let’s talk to the patient. Press [A], select an (i) icon, and choose a few questions. Do you think this patient is confused or oriented?
This patient responds normally, appears oriented, and does not appear confused. Do you think this patient is in shock?
This patient’s heart rate is normal, and they respond to questions normally. This patient does not appear to be in shock (currently).
Informational Step: If the patient did appear to be in shock, at the Tier 1 level, you can look for bleeding to control (perhaps not initially identified, or interventions are not working), prioritize getting them to more advanced care, lay the patient flat (if tolerated), and cover them to prevent heat loss. More advanced providers can obtain intravenous access and give blood or fluids.
Informational Step: Bleeding is a common cause of shock in recently injured combat casualties. This bleeding may have occurred before you controlled it. Additionally, it can be bleeding that requires surgery (such as bleeding in the abdomen, pelvis, or chest).
In TCCC, once life-threatening bleeding is controlled, the airway has been assessed and cleared, chest and respirations have been assessed and managed, and you have assessed and managed circulation and shock, the next priority is assessing and managing HYPOTHERMIA MARC[H].
Informational Step: At the All Service Member (ASM) / Tier 1 level in Tactical Combat Casualty Care, preventing hypothermia is critical, even in hot environments. A casualty who has lost a lot of blood is at high risk of their body temperature dropping, which can lead to worsened bleeding and even death.
Informational Step: When you finish treating immediate threats, protect the casualty from the ground and the elements. In the field, insulate them from the ground (with a jacket or pack), and cover them with a blanket, poncho, hypothermia wrap, or whatever is available. Focus on keeping their core warm, especially the chest, back, and head. Wet clothing should be removed if possible.
This simulator does not allow free clothing movement under the patient; however, we can put the patient’s clothing back on. Point and select the pile of clothing and put the patient’s clothing back on.
Now that we have completed our primary MARCH survey, we will check the patient for head injury, burns, eye trauma, and fractures.
We will start with head injuries. At the All Service Member (ASM) / Tier 1 level of Tactical Combat Casualty Care, the focus for head injuries is on recognition and rapid communication to ensure appropriate evacuation urgency and to facilitate rapid treatment upon arrival to more advanced care.
Informational Step: You have already asked this patient questions and determined they are oriented (and not confused). If a teammate has been exposed to a blast, fall, or direct hit to the head, it’s essential to watch for signs such as, slurred speech, repeated questions, unconsciousness, or unusual behavior. If any of these are present, you should suspect a head injury and help the patient get more care.
Next, look at the patient’s pupils. Are they equal?
The patient’s pupils are equal (normal). If one was big and the other was small (abnormal), this could indicate a head or brain injury.
Next, look at and behind the patient’s ears for bruising or fluid draining from the ears. Does this patient have fluid coming from the ears or bruising behind them?
The patient does not have fluid coming from the ears (normal), and there is no bruising behind the ears (normal). If there was fluid from the ears (abnormal - potentially cerebrospinal fluid) or bruising behind the ear (abnormal - Battle’s sign), this could indicate a serious head injury.
Informational Step: Cervical spine (neck/c-spine) management in battlefield environments is debated. If the patient experiences severe trauma, it is best to avoid moving the casualty’s head or neck more than necessary while still doing what is needed. Get the patient to safety, perform other lifesaving treatments, and move the neck as little as possible (the best you can).
Do you think this patient has a spine injury?
This patient does not have evidence of a head or c-spine injury. Next, we will assess the patient for burns.
Now that we have completed our primary MARCH survey and assessed and managed head injuries, the next priority is to assess for burns.
Informational Step: At the All Service Member (ASM) / Tier 1 level in Tactical Combat Casualty Care, your role in treating burns is to recognize them, remove them from the heat (or alternative burning) source and provide basic treatment.
Informational Step: This starts by checking the extent and location of any burns, focusing especially on the face, hands, groin, or large body areas. Then you would cover the burn with a dry, clean dressing or a burn-specific dressing (if available) to help protect the area and reduce pain. If the casualty is burned around the face or neck, be alert for airway involvement, which can rapidly obstruct.
Have you identified any burn injuries on this patient?
This patient does not have evidence of any burn injuries.
Now that we have completed our primary MARCH survey and assessed and managed head and burn injuries, the next priority is to evaluate for eye trauma.
Informational Step: At the All Service Member (ASM) / Tier 1 level of Tactical Combat Casualty Care, your role in managing eye trauma is to recognize serious injuries and protect the eye from further damage.
Informational Step: If a casualty has an eye injury, cover the injured eye with a rigid, protective shield like a ballistic eye cup or the bottom of a foam cup, or even safety glasses, being careful not to apply pressure on the eye. If both eyes are injured, cover them both while reassuring and guiding the casualty. If an object is stuck in the eye, do not try to remove it.
Does this casualty have any eye injuries?
This patient does not have evidence of any eye injuries.
Now that we have completed our primary MARCH survey and assessed and managed head, burn, and eye injuries, the next priority is to assess for fractures.
Informational Step: At the All Service Member (ASM) / Tier 1 level of Tactical Combat Casualty Care, your goal when dealing with fractures (broken bones) is to recognize the injury and try to prevent further harm by stabilizing the injury. Do not try to straighten the limb or push any exposed bone back in.
Informational Step: If trained and materials are available, you can help apply a rigid splint or use an improvised splint (like a rifle, stick, or other firm object) to support the limb in the position found. Securing the splint above and below the injury is essential to limit movement.
Does this casualty appear to have any fractures?
This patient does not have evidence of any fractures.
Now that we have completed our primary MARCH survey and assessed and managed head, burn, eye, and fracture injuries, the next priority is documenting the care we provided.
Informational Step: Documentation is a critical task that helps ensure the casualty receives the right care. Accurate and timely documentation ensures that no critical information is lost during handoffs, helping to save lives by keeping everyone on the same page as care continues. If a formal documentation card is unavailable, you can write on tape, the casualty’s skin, or clothing to record care given.
Next, pick up the TCCC Casualty Care Card from the IFAK and pick up the marker and review the sections. Then complete to the best of your ability (clicking in the marker while holding it near the TCCC card will give you credit for this task in this simulation, you should see "filled" appear on the card).
Informational Step: In real life, include key details like the time and location of injuries, any tourniquet placement and time applied, treatments performed (such as bleeding control, airway support), and the casualty’s condition. In the field, attach the card securely to the casualty, ideally on their chest or belt loop, where medics and evacuation teams can easily find it.
Now that we have completed our primary MARCH survey and assessed and managed head, burn, eye, and fracture injuries, and documented the patient’s care, the next priority is to ensure we have communicated with medical evacuation, leadership, and the patient.
Informational Step: At the All Service Member (ASM) / Tier 1 level in Tactical Combat Casualty Care, communication is one of your most important responsibilities during and after providing care. Once you’ve given initial treatment, you must quickly and clearly report the casualty’s condition and interventions to your team, medics, and higher medical personnel.
Informational Step: A few standard communication tools to be aware of are the 9-Line (start medical evacuation request) and the MIST report (Mechanism, Injuries, Signs, Treatments). It is also critical to communicate what is occurring to the casualty, even if they do not appear to be conscious; continue to tell them what you are doing in as calm and reassuring a manner as possible.
Next, talk to the patient and tell them what we are doing. Press [A], select an (i) icon, and select the appropriate statement.
Next, let’s make sure evacuation and command are aware of this patient by using the radio. Take your right hand and reach by your left shoulder to pick up the radio, and use the [TRIGGER] to notify your team. Activating the radio will give you credit for this task.
Next, we must disposition the patient (determine where to send them next). To do this, open your tablet by clicking [X] on your controller, then select the disposition tab, and then select [MEDICAL EVACUATION]. This ends your scenario. Next, we will start taking care of some patients with injuries in each category. Exit this simulation and select the following scenario to continue.